 Save
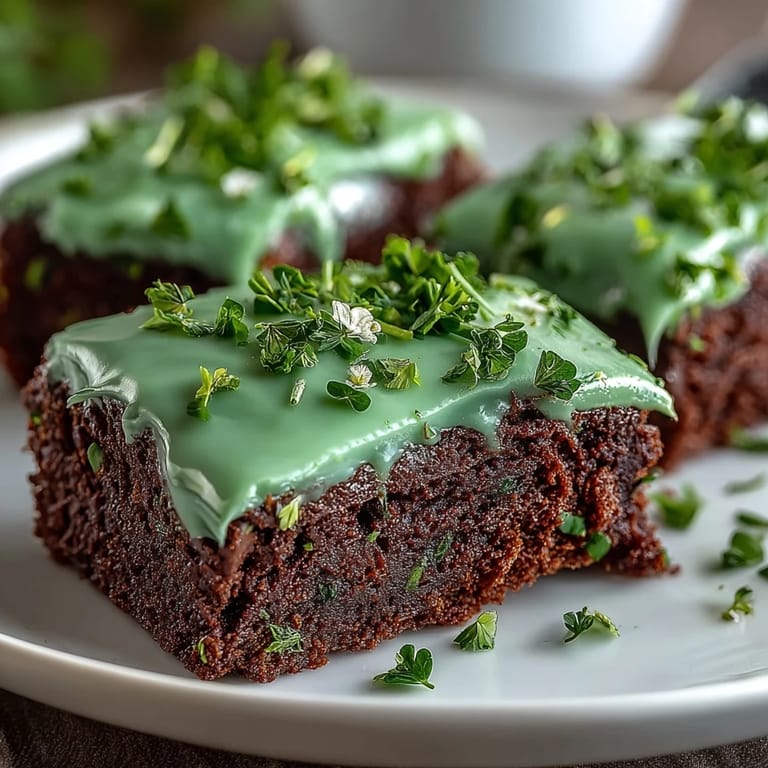
Save My kitchen smelled like chocolate and mischief last March when my niece insisted we make something green for St. Patricks Day—but not the typical cookies everyone expects. She pulled out a shamrock cookie cutter and challenged me to turn brownies, those dark, fudgy squares I'd always kept simple, into something festive. Twenty minutes later, we had our answer: rich chocolate bases crowned with emerald icing, cut into lucky shapes. It became our yearly tradition before we even finished the first batch.
There's something about handing someone a shamrock brownie that changes the whole mood of a gathering. I brought a batch to a neighborhood potluck once, and watching people's faces light up when they realized these weren't just regular brownies but shaped and iced versions made me understand why presentation matters. One neighbor actually asked for the recipe right there, frosting on her fingers, and that's when I knew these deserved a permanent spot in my spring rotation.
Ingredients
- Unsalted butter (1/2 cup): Use softened butter for even melting, and resist the urge to rush this step by using high heat, which can scorch and turn your brownies bitter.
- Granulated sugar (1 cup): This sweetness balances the deep cocoa, so don't skimp or substitute with brown sugar unless you want a different texture.
- Large eggs (2): Room temperature eggs mix more smoothly into the batter and create a better crumb structure than cold ones.
- Vanilla extract (1 teaspoon for brownies, 1/2 teaspoon for icing): Real vanilla makes a noticeable difference in the flavor depth, but pure or imitation both work fine here.
- Unsweetened cocoa powder (1/3 cup): This is where the brownie magic lives, so use good quality cocoa if you can—you'll taste the difference immediately.
- All-purpose flour (1/2 cup): Measure by spooning into the cup and leveling, not by scooping directly from the bag, which packs in extra flour and dries out brownies.
- Salt (1/4 teaspoon) and baking powder (1/4 teaspoon): These seem small, but they brighten the chocolate flavor and give the brownie structure without making it cakey.
- Powdered sugar (1 1/2 cups) and softened butter (2 tablespoons) for icing: The butter must be truly soft or your icing will be lumpy and difficult to spread smoothly.
- Milk (2 tablespoons): This loosens the icing to the right consistency; add it gradually so you don't overshoot and make the icing too thin.
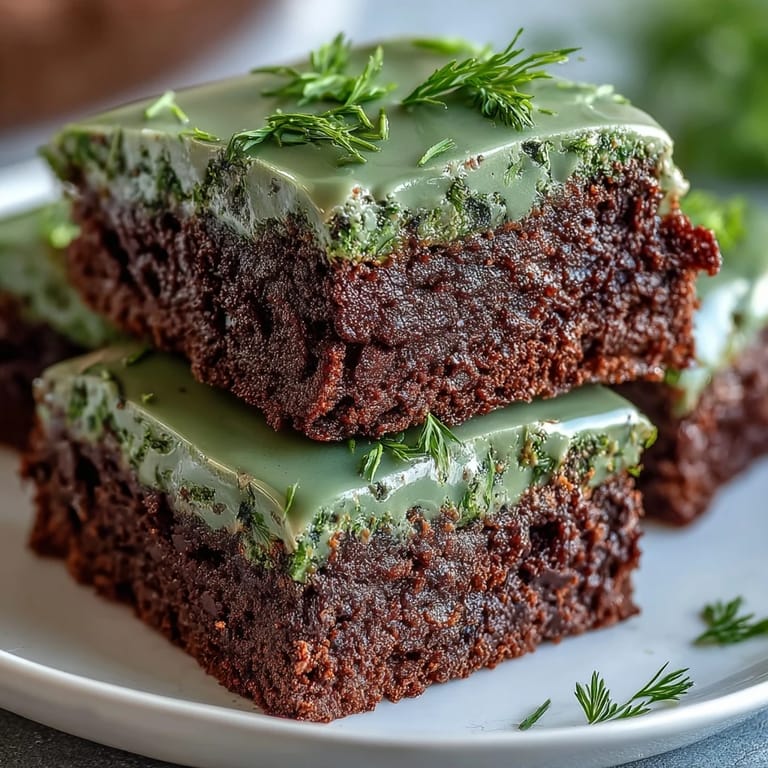
- Green food coloring: Gel coloring creates a more vibrant green than liquid, and you'll need far less, which keeps the icing from getting too thin.
- Green sprinkles or sanding sugar (optional): These add texture and that final festive touch, but they're truly optional if you prefer clean simplicity.
Tired of Takeout? 🥡
Get 10 meals you can make faster than delivery arrives. Seriously.
One email. No spam. Unsubscribe anytime.
Instructions
- Prepare your pan and preheat:
- Set your oven to 350°F and line an 8x8-inch pan with parchment paper, leaving some overhang so you can lift the brownies out cleanly later. This small setup step saves you from fighting with a stuck brownie when you're ready to cut.
- Melt and mix the base:
- In a medium saucepan over low heat, melt the butter slowly, then remove from heat and stir in sugar, eggs, and vanilla until the mixture looks smooth and glossy. This gentle approach prevents the eggs from cooking too much and keeps your brownies tender.
- Combine dry ingredients carefully:
- Add the cocoa powder, flour, salt, and baking powder to your wet mixture and stir just until no streaks of flour remain. Overmixing here develops gluten and makes brownies tough, so stop as soon as everything comes together.
- Transfer and smooth:
- Pour the batter into your prepared pan and use a spatula to level the top so the brownies bake evenly. Take a breath—you're almost there.
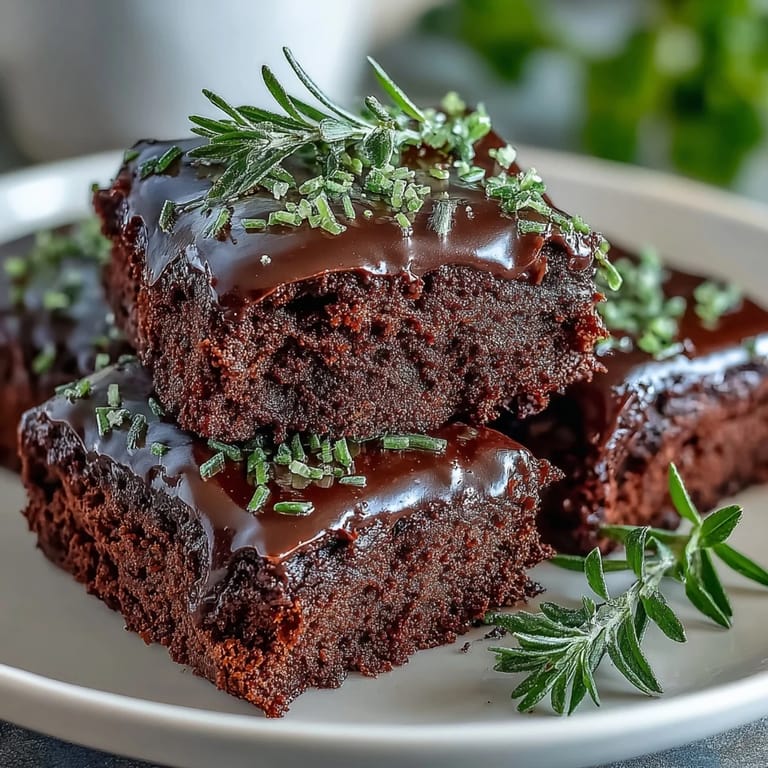
- Bake to fudgy perfection:
- Bake for 25 to 30 minutes, checking at 25 with a toothpick inserted near the center. It should come out with a few moist crumbs clinging to it, not completely clean—this is the sweet spot between fudgy and cooked through.
- Cool completely:
- Let the brownies rest on a wire rack until they reach room temperature, which takes about 30 minutes. Cutting warm brownies will cause crumbling and mess, so patience here rewards you later.
- Prepare the icing while waiting:
- Beat together powdered sugar, softened butter, milk, and vanilla until smooth and creamy, then add green food coloring a few drops at a time. The color deepens as you keep mixing, so it's easy to overshoot, so go slow.
- Cut into shamrocks:
- Lift the cooled brownies from the pan using the parchment overhang, then use a shamrock cookie cutter to cut out your shapes. Wiping the cutter clean between cuts prevents chocolate crumbs from marring the next shape.
- Ice and decorate:
- Spread a generous dollop of green icing onto each shamrock and smooth it with a small offset spatula or the back of a spoon. Top with green sprinkles if using, and let the icing set for a few minutes before serving.
 Save
Save I realized the real magic of these brownies wasn't the shape or even the color, but the moment when someone bit into one and tasted the deep chocolate under the creamy icing. It's the kind of small joy that makes St. Patricks Day feel less about luck and more about taking time to do something a little special.
The Shamrock Shape Story
Finding a shamrock cookie cutter used to feel impossible until I learned that kitchen supply shops and even grocery stores stock them starting in late February. If you can't locate one before St. Patricks Day, any festive shape works just as well—stars, hearts, or even simple rounds taste identical. The shape is purely for the eyes, and sometimes the best dishes are the ones that make people smile before they even take a bite.
Storing and Keeping
These brownies stay fresh in an airtight container at room temperature for up to three days, though the icing will soften slightly as time passes. If you're making them ahead for a party, ice them the morning of serving rather than the night before, so the green stays vibrant and the texture stays true. The unbaked brownie batter can even be made a day early and refrigerated in the pan, though you'll need to add a few minutes to the baking time if baking from cold.
Troubleshooting and Variations
Brownies turn out dry when overbaked or when too much flour sneaks into the batter, so measure carefully and watch your oven closely toward the end of baking time. If your icing spreads too thin, you likely added too much milk; powdered sugar can always be added to thicken it back up. If you want extra richness, fold mini chocolate chips into the batter before baking, or add chopped nuts for a subtle crunch.
- For a stronger chocolate flavor, swap out one tablespoon of flour for an extra tablespoon of cocoa powder.
- Make the icing less sweet by using a touch of cream cheese in place of some of the butter for a tangier edge.
- If green food coloring stains your hands, wear gloves while decorating to avoid looking like you've been on an actual leprechaun adventure.
 Save
Save These shamrock brownies have turned into my secret weapon for turning an ordinary day into something memorable. Whether you're hosting a celebration or just want to bring a little festive cheer into your kitchen, these deliver chocolate comfort wrapped in emerald joy.
Cooking Questions & Answers
- → How do I ensure brownies are fudgy?
Use the right balance of butter and sugar, avoid overmixing the batter, and bake until a toothpick shows moist crumbs.
- → What is the best way to get clean shamrock shapes?
Let brownies cool completely before cutting and use a metal shamrock cookie cutter, wiping it between cuts.
- → How to achieve the vibrant green color in icing?
Add green food coloring a few drops at a time to powdered sugar and butter mixture until the desired shade is reached.
- → Can I add texture to the brownies?
Yes, adding mini chocolate chips or chopped nuts to the batter can provide extra texture and flavor.
- → What is the best way to store these brownies?
Keep them in an airtight container at room temperature for up to 3 days to maintain freshness.