 Save
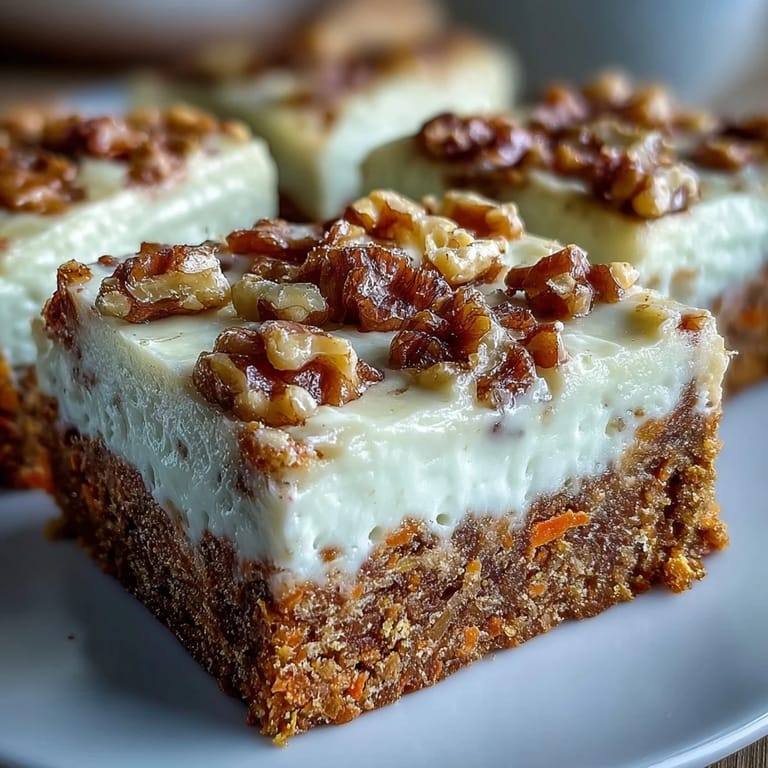
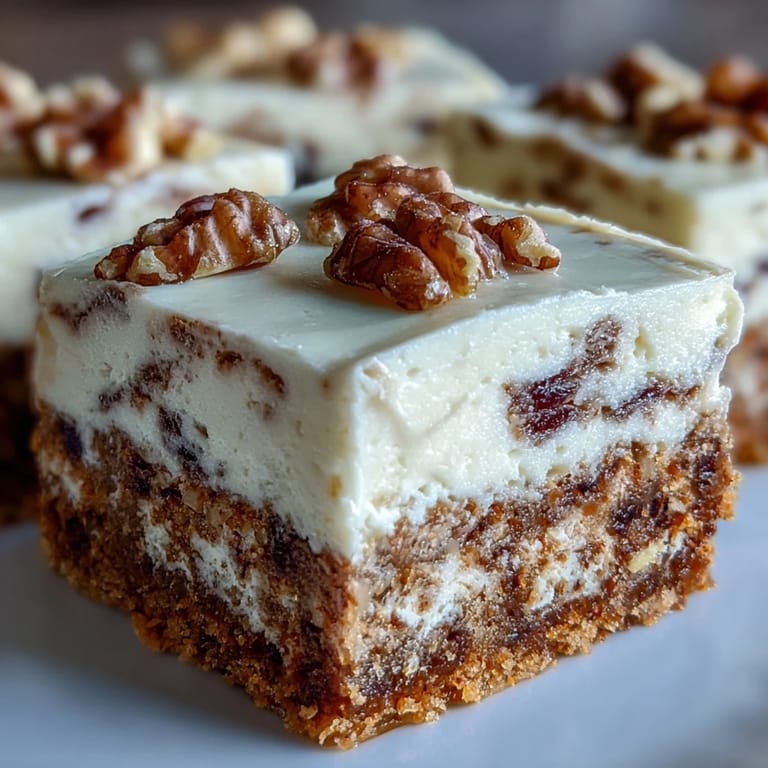
Save The first time these Carrot Cake Cheesecake Bars emerged from my oven, the kitchen felt almost theatrical—steam clung to the windows and the scent of warm spice seemed to linger in every corner. I wasn't aiming for perfection, just curious about what would happen if I layered cheesecake atop carrot cake rather than swirling it through. My cat watched, unimpressed, as I nervously carved the first bar. It was spring, and the promise of something sweet-yet-refreshing excited me more than usual. Once cooled, the marbled top reminded me of playfully mixing paints as a kid—messy but beautiful.
One chilly afternoon, I served these bars after a long walk with friends through the budding neighborhood gardens. Silence hung in the air as everyone took their first bite, broken by laughter when someone confessed they’d never tasted carrot cake with cheesecake before. I remember the way the bars disappeared almost immediately, leaving only crumbs and satisfied smiles. It felt like sharing a bright, cozy moment, even as spring showers tapped against the window. The experience turned an experiment into a cherished standby for our group.
Ingredients
- All-purpose flour: Gives structure to both cake and cheesecake; sift to avoid lumps.
- Baking powder & baking soda: These leaveners help the carrot cake rise just enough—don’t substitute one for the other.
- Salt: Balances sweetness and highlights spices, so don’t skip it.
- Ground cinnamon & nutmeg: Their warmth is what makes carrot cake sing; fresh spices truly boost flavor.
- Vegetable oil: Keeps the cake layer moist and tender; measure carefully—too much causes a greasy bite.
- Granulated & brown sugar: Blend for caramel sweetness, and pack brown sugar tightly for accurate measurement.
- Eggs: Bind and enrich both layers; let them come to room temperature before mixing.
- Vanilla extract: Softens the tang of cream cheese, infusing each layer with aroma.
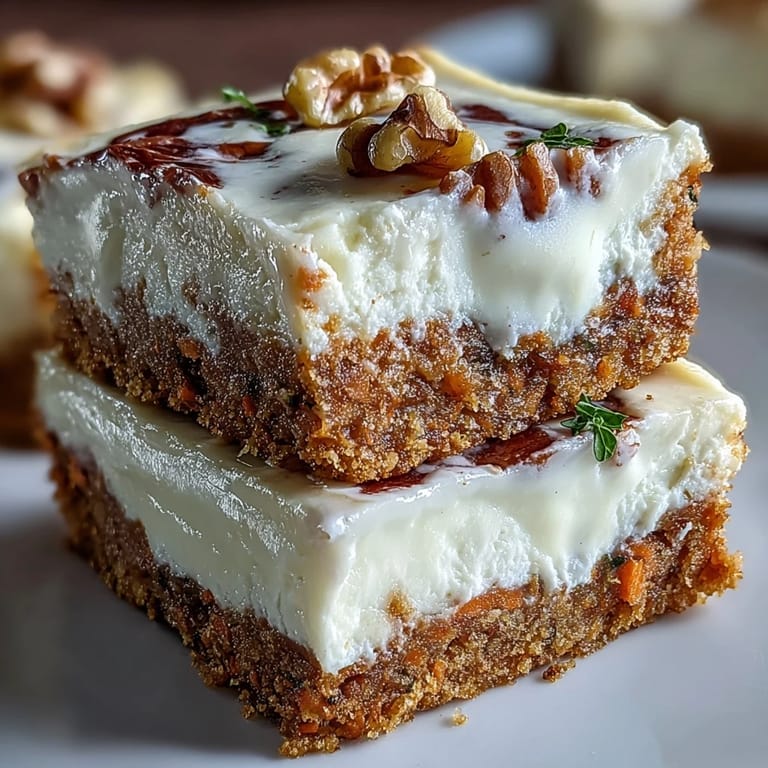
- Finely grated carrots: Grate by hand if possible; pre-shredded carrots don’t blend as well.
- Walnuts or pecans (optional): Add crunch and earthiness, toast lightly for maximum flavor.
- Cream cheese: Should be fully softened for extra smooth cheesecake; a brief microwave helps if it's cold.
- Topping nuts & cinnamon (optional): Make the bars prettier and add texture; sprinkle just before baking.
Tired of Takeout? 🥡
Get 10 meals you can make faster than delivery arrives. Seriously.
One email. No spam. Unsubscribe anytime.
Instructions
- Preheat and Prepare:
- Set your oven to 350°F (175°C) and line your baking pan with parchment, gently pressing into corners—you’ll thank yourself later when lifting out the bars.
- Mix Carrot Cake Batter:
- Whisk dry ingredients until fragrant, then stir oil, sugars, eggs, and vanilla together until glossy; fold in carrots and nuts, feeling the batter thicken.
- Blend Cheesecake Layer:
- Smooth cream cheese and sugar until almost cloud-like, then add eggs one at a time; sprinkle in vanilla and flour, scraping the bowl so nothing’s missed.
- Layer and Swirl:
- Spread half the carrot cake batter across your pan, then pour cheesecake over—dollop the rest of carrot batter and swirl with a knife, making gentle waves.
- Add Toppings:
- Scatter nuts and cinnamon for a hint of crunch and spicy aroma, pausing to admire your handiwork.
- Bake and Cool:
- Bake until edges are golden and center just-set; cool fully, then chill for 3 hours—patience brings neat slices.
 Save
Save Watching these bars disappear at a spring picnic reminded me that food can turn strangers into friends. Someone declared them 'the happiest dessert,' and for a moment, that felt completely true.
How To Get A Perfect Swirl
When swirling the carrot and cheesecake layers, use the tip of a butter knife and make slow, figure-eight motions. Overdoing it muddles the flavors, so aim for gentle contrasts and visible ripples. If you hesitate, just let the pattern happen naturally—perfection isn’t the goal.
Making Ahead and Storing Tips
These bars hold up beautifully when chilled overnight and taste even better the next day. Slice after refrigeration for clean, tidy pieces and layer wax paper between bars if stacking. If you’re planning a busy week, they freeze well for up to a month—wrap tightly to avoid freezer burn.
Choosing The Right Tools For Easy Bars
A sturdy 9x9 pan prevents uneven baking, and parchment paper is your secret weapon for easy removal. Don’t skip using a hand mixer for the cheesecake; this ensures a light, smooth layer. Have a rubber spatula handy for scraping every bit of batter, and use a thin knife for swirling.
- If your cream cheese is stubbornly cold, microwave it for just ten seconds.
- Check doneness by gently shaking the pan—the center should barely jiggle.
- Slice with a hot knife for clean edges every time.
 Save
Save Every batch brings a little sunshine regardless of season, and sharing these bars always makes the day feel brighter. Enjoy the marbled magic and let your kitchen fill with the warmth of spice and sweet anticipation.
Cooking Questions & Answers
- → Can I use pecans instead of walnuts?
Yes, chopped pecans can replace walnuts in both the cake, cheesecake, and topping for equally delicious results.
- → How do I get the perfect marbled swirl?
Swirl gently with a knife after dolloping extra cake batter, mixing only enough for a visible marble effect.
- → Can this be made gluten-free?
Substitute the all-purpose flour with a 1:1 gluten-free blend for bars suitable for gluten-free diets.
- → What is the best way to slice the bars?
Chill thoroughly and use a sharp knife cleaned between cuts to ensure neat, clean slices.
- → Can I add coconut or raisins?
Yes, mixing in shredded coconut or raisins with the carrot cake batter adds flavor and texture to the dessert.
- → How long should I refrigerate before slicing?
Let the bars cool, then refrigerate for at least 3 hours for best results and clean cuts.