 Save
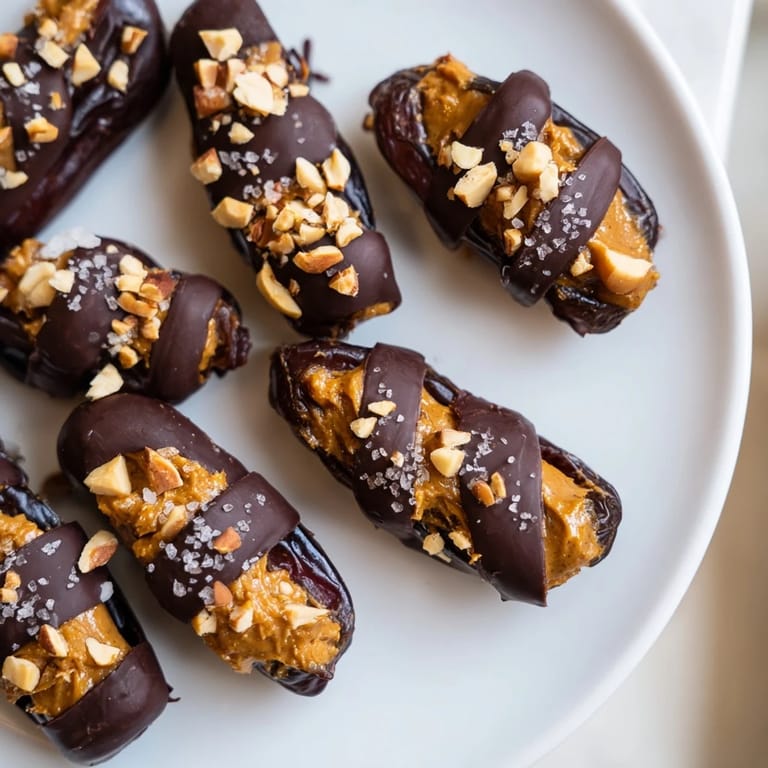
Save There's something about the smell of melted chocolate hitting warm peanut butter that takes me straight back to raiding the candy aisle as a kid, except now I get to feel a little smarter about it. These chocolate date Snickers hit that perfect sweet spot where indulgence meets actual nutrition, and honestly, they came about because I was tired of choosing between satisfying a craving and not feeling like I'd derailed my health entirely. One afternoon, I had a bowl of Medjool dates staring at me, a jar of peanut butter, and the stubborn idea that homemade candy could taste just as good as the store-bought version. Turns out, it does—better, even.
I made these for a potluck last spring and watched someone take a bite, pause, and say, "Wait, these are homemade?" It's that moment that makes you understand why cooking for people matters—not because it's complicated, but because it shows you cared enough to put in a little thought. My friend Sarah kept circling back to the plate all evening, and by the end of the night, she was asking for the recipe. The funny part? She texted me a week later saying she'd made a batch and accidentally left them in the car during a warm afternoon, only to rediscover them the next morning. That's when we both learned that while they soften up, they taste pretty incredible when you let them come back to room temperature and the chocolate gets a little chewy.
Ingredients
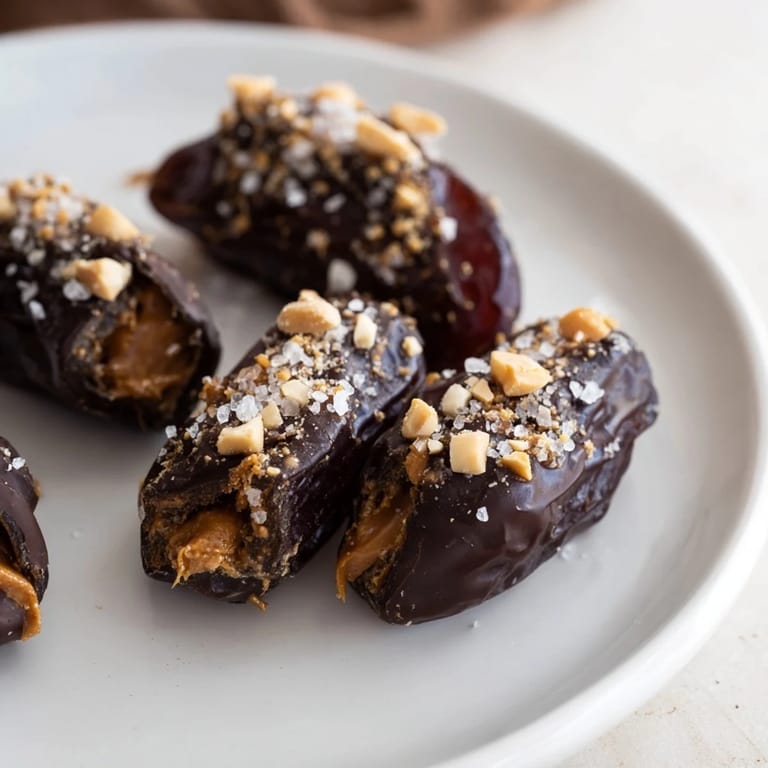
- Medjool dates (12 large, pitted): These are the buttery, soft ones that actually taste like caramel, not the hard little pebbles some people think of when they hear "dates." If you can only find unpitted ones, just make a small slit and pop the pit out—they give you a natural pocket that makes the whole process feel less fussy.
- Creamy peanut butter (6 tablespoons): The kind that's just peanuts and maybe a tiny bit of salt, not the sweetened stuff. It needs to contrast with the chocolate without fighting it, and it should be thick enough to stay put inside the date without leaking everywhere when you bite down.
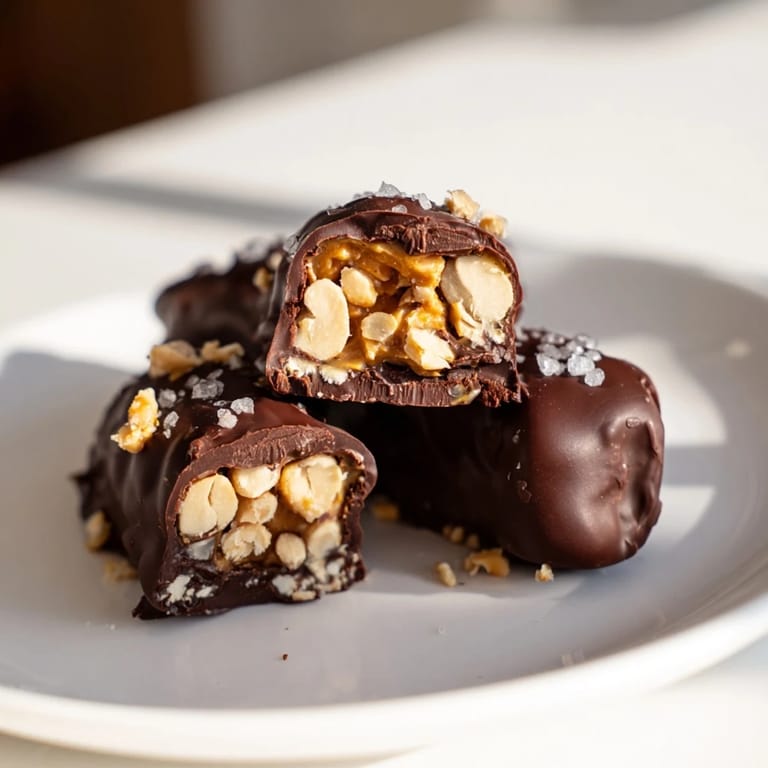
- Roasted unsalted peanuts (3 tablespoons, roughly chopped): The chop is key here—you want pieces chunky enough to feel like texture but small enough not to poke through the date skin. I learned this the hard way after leaving some too whole and feeling them snap awkwardly between my teeth.
- Dark chocolate (200 g, at least 60% cocoa, chopped): Don't go too dark unless you love that almost-bitter hit, but don't skimp with milk chocolate either—it gets cloying against the sweetness of the dates. The chopping matters because it melts faster and more evenly than a chocolate bar broken into chunks.
- Coconut oil (1 tablespoon, optional): This isn't just a filler; it actually keeps the chocolate fluid enough to coat smoothly without making it taste weird. Skip it if you're not into coconut, but honestly, you barely taste it.
- Flaky sea salt (for topping): A tiny pinch while the chocolate is still wet creates this moment where salty and sweet collide, and suddenly it tastes like a real candy bar, not just something sweet.
Tired of Takeout? 🥡
Get 10 meals you can make faster than delivery arrives. Seriously.
One email. No spam. Unsubscribe anytime.
Instructions
- Open your dates like you're unwrapping something precious:
- Slice lengthwise on one side, just deep enough to reach the pit, then gently pry open. If you've already got pitted dates, you're golden—just open them up like a book. They should feel soft and a little tacky, which means they're perfect for stuffing.
- Build the filling layer by layer:
- Dollop about half a tablespoon of peanut butter into each date, then sprinkle your chopped peanuts on top like you're being intentional about it. Press the date closed gently—firm enough to hold together, soft enough not to squeeze all the filling out the sides.
- Set the stage with parchment:
- Line your baking sheet before you do anything else with chocolate. Future you will be grateful you did this instead of trying to unstick chocolate from a bare sheet.
- Melt chocolate like you're coaxing it, not forcing it:
- Use a microwave-safe bowl and go thirty seconds at a time, stirring between each burst. This prevents scorching and gives you actual silky chocolate instead of grainy, seized stuff.
- The dip is where the magic happens:
- Use a fork to fully coat each date in chocolate, let the excess fall back into the bowl, then slide it onto your parchment paper. The fork keeps your hands clean and gives you control.
- Season while it's still warm:
- If you're using salt, sprinkle it on while the chocolate is still wet. Once it sets, the salt just sits on top like it's confused about being there.
- Chill until set, then eat::
- Ten to fifteen minutes in the fridge does the trick. They can go straight to your mouth cold, or you can let them sit for a few minutes and enjoy them a touch softer.
 Save
Save The best part about these isn't even eating them—it's the moment someone realizes what you've made is actually this simple and actually this delicious. It changes how they think about homemade candy, which is a small thing but somehow matters.
Flavor Combinations Worth Exploring
Once you nail the basic version, the variations practically write themselves. I've experimented with swapping the peanut butter for almond butter (which makes them feel fancier), and I've gone the nut-free route for a friend using sunflower seed butter with crushed pumpkin seeds—honestly, it barely changes the vibe. The chocolate is your anchor, so you can play around with the filling without losing the plot. Dark chocolate with white chocolate drizzle looks stunning, milk chocolate with the peanut version tastes like a childhood dream, and if you're feeling fancy, a tiny splash of vanilla or espresso powder in the melted chocolate takes the whole thing somewhere else.
Storage and Making Ahead
These are the perfect make-ahead snack because they actually improve when they've had time to sit together in the fridge. The flavors meld, the chocolate sets properly, and you get to feel prepared about life. I make a batch on Sunday and they're good through Friday if I keep them in an airtight container in the fridge, which means I have something grab-able all week without the guilt of processed candy.
The Right Pairings and Serving Ideas
These aren't just dessert—they're actually perfect with a cup of strong coffee in the morning, or alongside some fruit and cheese if you're pretending this is a fancy snack situation. Cold milk is the pairing that works every single time, that nostalgic combination that just makes sense. You could bring them to someone's house and feel confident about it, package them as a gift, or just keep them for the moments when you need something that hits the sweet spot without overthinking.
- Serve them cold straight from the fridge for maximum chocolate structure, or let them sit out for five minutes if you like a slightly softer, chewier vibe.
- If you're gifting them, stack them in a small box with parchment between layers so the chocolate doesn't smudge.
- They last about a week in the fridge, but they rarely last that long because people keep finding them and eating one more.
 Save
Save These dates remind me that sometimes the best homemade version of something doesn't need to be complicated—it just needs you to care enough to do it. They're the kind of recipe that makes you feel like you can actually cook.
Cooking Questions & Answers
- → What type of dates work best?
Large Medjool dates are ideal due to their softness, sweetness, and size, making them easy to fill and coat.
- → Can I substitute peanut butter?
Yes, almond or cashew butter offers alternative flavors, while sunflower seed butter suits nut-free needs.
- → How do I achieve a smooth chocolate coating?
Gently melt dark chocolate with a bit of coconut oil in short bursts, stirring frequently for a glossy finish.
- → Is it necessary to chill after coating?
Chilling for 10-15 minutes helps the chocolate set firmly, ensuring a crisp outer layer.
- → How should these treats be stored?
Keep them in an airtight container in the refrigerator for up to one week to maintain freshness and texture.